A short tutorial on how to lock blocks in WordPress
Since the launch of WordPress 6.0, one of the features is the ability to lock blocks, which can be used to prevent the accidental removal of a specific block or to prevent specific users from removing blocks.
You can also use locking to restrict the editing of reusable blocks.
You need to look for the “Lock” setting in the block toolbar’s options dropdown, as shown in the highlighted screenshot below:

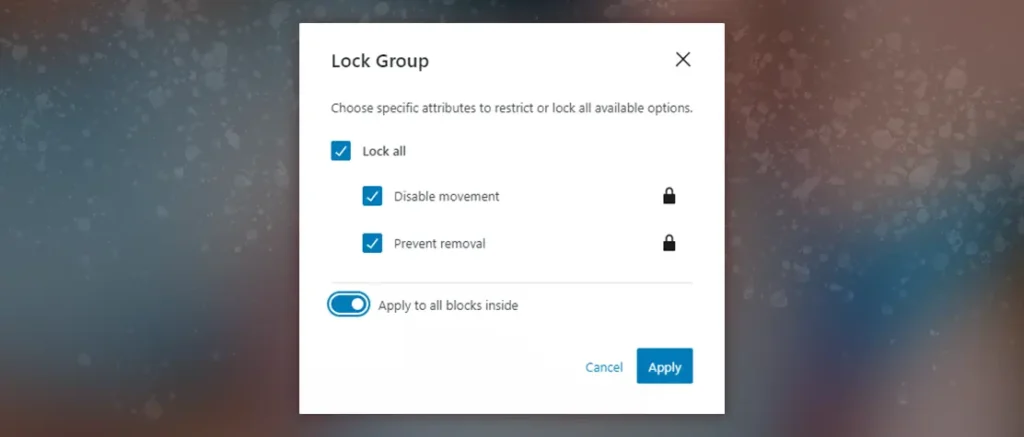
When you click on this option to lock the block, a modal appears that allows you to disable movement of the block or prevent its removal. You can select between lock all, disable movement, or prevent removal.

You can also lock the inner blocks of the group, cover and columns block. For these three blocks, there is a fourth option inside the block locking modal called “Apply to all blocks inside”. See the very last option in the screenshot above for this.
At first glance, this may not seem like the most exciting feature. However, the real power of block locking is on the website development side of things. Website developers can use the new lock key to prevent end-users from moving or removing specific blocks in their templates, which should lead to themes being much harder to break or change in ways they were never designed for.
While this new feature offers more control for devs and theme authors, it does not grant total power. Users can still unlock blocks by clicking the lock icon in the toolbar.
A developer could disable any user’s ability to move or remove blocks. In real-world cases, this should help website devs to create tightly-controlled experiences for clients, especially when handing over access to the site editor.
A more in-depth article on block locking can be found here if you fancy a technical read.
If you want any help with editing your website, get in touch with us via our contact page.